Water Stain on a Wall: Leak, Rising Damp, Penetrating Damp or Condensation?
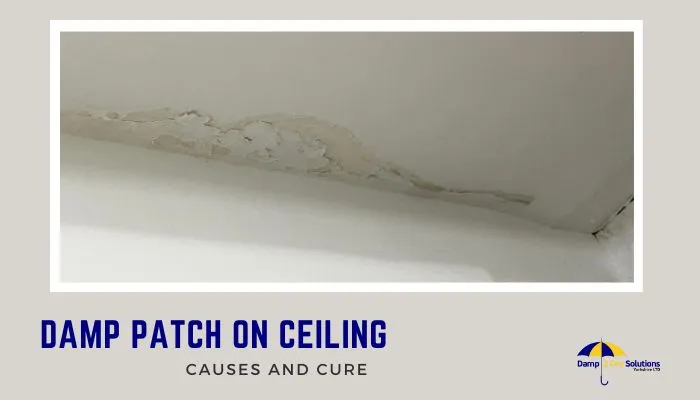
A stain on a wall is a symptom shared by four unrelated faults, and the treatment for one makes another worse. Here is how shape, height and behaviour narrow it down, and why a moisture meter reading on its own settles nothing.
Four different faults, one symptom
A discoloured patch on a wall is not a diagnosis. It is the shared symptom of four unrelated problems, three of which are building faults and only one of which is plumbing. They need entirely different work, and the treatment for one will do nothing for another. Injecting a chemical damp proof course into a wall that is actually being wetted by a leaking pipe is a well documented way to spend money and still have a wet wall.
The four candidates are a plumbing leak, rising damp, penetrating damp and condensation. Each leaves a different signature, and the signature is available for free before anyone puts a meter on anything.
| Cause | Shape and edge | Where on the wall | Timing |
|---|---|---|---|
| Plumbing leak | Defined, often with a darker centre and a tail running downward | Anywhere, and frequently on an internal wall where no weather reaches | Constant, or tied to use of a specific appliance. Indifferent to the weather |
| Rising damp | A horizontal tide mark with a fairly even top edge, often with a salt band | Low level only, on a ground floor wall | Persistent, slightly worse in winter, never above its ceiling height |
| Penetrating damp | A patch matching an external defect, sometimes with a run pattern | Any height, almost always on an external wall | Appears during and after driving rain, dries between |
| Condensation | Diffuse, no sharp edge, often mould rather than a stain | Cold spots: corners, reveals, lintels, behind furniture, external walls | Winter, worse with occupancy, heating patterns and poor ventilation |
If the wall is an internal partition with nothing outside it and no ground beneath it, three of the four candidates are already unlikely, which is why the first question is always about the wall rather than about the stain.
Reading the stain: height, edge and behaviour
Three properties do most of the diagnostic work, and none of them requires equipment.
Height is the single best clue
Genuine rising damp is capillary movement of ground water through masonry, and capillary rise is self limiting. The water can only climb until evaporation from the surface balances the rate of supply, which in practice means low level, commonly no more than about a metre and often less. A damp patch at head height on a ground floor wall is not rising damp, whatever anyone says, because the physics does not allow it. A patch at first floor level certainly is not.
Conversely, a stain that starts high and runs downward is describing gravity, which means either a leak above it or water entering from outside at that height. Water does not flow uphill, and the top edge of a stain is usually much closer to the source than the bottom is.
The edge tells you about the mechanism
A sharp, defined edge with a darker centre suggests a discrete source feeding a particular spot: a pipe, a defect, a specific point of entry. A soft, diffuse boundary with no clear centre suggests a surface phenomenon across a broad area, which points at condensation or at a wide failure of the wall's weather resistance.
Behaviour over time is the third property, and it is the one most worth recording. Mark the edge of the stain in pencil and write the date next to it. Two weeks later you will know whether it is growing, static or shrinking, and that single observation eliminates more candidates than most instruments do. A stain that grows in dry weather is a leak. One that grows only in wet weather is penetrating damp. One that appears each winter and fades each spring is condensation.
Rising damp and penetrating damp are not the same thing
These get conflated constantly, and they have different causes, different evidence and different remedies.
Rising damp requires ground water, a porous masonry route and either no damp proof course or one that has been defeated. Approved Document C of the Building Regulations deals with resistance to moisture and reflects the long standing rule that a damp proof course should sit at least 150mm above the adjoining ground level. Most buildings in London have one. What they often do not have is that 150mm, because ground levels have been raised over the years by new paving, a raised patio, a flower bed or a path laid over the old one.
How a damp proof course gets bridged
A working DPC can be rendered useless without ever failing, and bridging is far more common than failure.
- Raised external ground. Paving, decking or soil above the DPC line lets water enter the masonry above the barrier entirely.
- Render carried down over the DPC. External render taken past the line provides a continuous path around it.
- Debris in the cavity. Mortar droppings bridging a cavity at wall tie level carry water across from the outer leaf to the inner one.
- Internal floor screeds and plaster. A plaster coat or screed carried across the DPC does the same thing on the inside.
- Abutting structures. A porch, a lean to or an extension built against the wall without its own detailing.
Establishing whether the DPC is bridged is a matter of looking outside at ground level, and it is free. It is also the step most often skipped before a chemical injection is recommended.
Penetrating damp is lateral. Water crosses the wall from outside, driven by wind and rain, through defective pointing, cracked render, a failed cavity tray, blocked weep holes, a defective sill, a parapet, or simply a solid brick wall that is saturated by prolonged driving rain. The identifying feature is that it responds to weather rather than to use, and it usually has a visible external cause if somebody goes and looks in the right conditions.
Salt bands and tide marks read the history, not the present
Where ground water has evaporated from a masonry surface over years, it leaves behind the dissolved salts it carried, principally nitrates and chlorides. These accumulate in a band at the top of the historic evaporation zone, which is what produces the classic tide mark: a horizontal line with fluffy white deposits, blown plaster or a change in the texture of the finish.
The band is evidence that the wall was wet at some point, at that height, for a long time. It is not evidence that the wall is wet now. A wall treated years ago can retain the salt band permanently, and because those salts are hygroscopic they draw moisture from humid air and keep the surface feeling damp long after the original cause has gone. This is why competent damp work distinguishes between an active source and a salt contaminated surface. The first needs the cause fixing, the second needs the contaminated plaster removing and replacing with an appropriate system, and doing one when the other was needed is why so many damp treatments are repeated.
Condensation, the most common answer and the least believed
Condensation is a surface temperature problem, not a water supply problem. Air holds a certain amount of moisture, and when it touches a surface below its dew point, that moisture deposits. The moisture comes from ordinary occupation: cooking, washing, drying clothes indoors, and breathing. The cold surface comes from thermal bridges, which is why condensation concentrates at window reveals, lintels, external corners and behind furniture pushed against an outside wall.
BS 5250, the code of practice for management of moisture in buildings, is the reference for this, and its framing is worth borrowing: condensation is a relationship between moisture production, ventilation and surface temperature. Change any of the three and the outcome changes. That is also why it responds to habits in a way that no other cause does.
Two features distinguish it. Mould, usually black and spotty, grows where surface humidity stays high, and mould is far more characteristic of condensation than of a leak, since a leak delivers clean water rather than the sustained high surface humidity mould wants. And the seasonal pattern is unmistakeable: it appears in cold weather and goes away in warm, year after year. Whether a leak can produce mould at all is a fair question, and it is covered in whether a water leak causes mould and damp.
Tests that actually separate them
A short sequence settles most cases, and it runs from cheapest to most invasive.
| Test | What it distinguishes | Caveat |
|---|---|---|
| Dated pencil mark on the stain edge | Growing, static or shrinking, and against what weather | Needs two weeks to mean anything. There is no shortcut |
| Water meter with everything off | Whether water is leaving the supply at all | Clears cold supply only. Heating, waste and rainwater are unaffected |
| Surface temperature and room humidity together | Condensation from everything else | Needs to be read in cold weather with the room in normal use |
| Look outside at ground level and at the wall face | Bridged DPC and penetrating damp | Best done during or just after heavy driving rain |
| Isolate the heating circuit and log boiler pressure | Heating pipework in or behind the wall | Slow losses need a full day of logging to show |
| Thermal imaging alongside the above | Cold bridges, hot pipe routes, evaporative cooling patterns | Reads temperature, never moisture. Useless alone |
| Carbide or gravimetric sample from drilled masonry | Actual moisture content at depth, which settles disputes | Destructive, slow, and describes only the point sampled |
Where the sequence points at pipework rather than at the building, the question becomes where in the wall, which is the subject of finding a leak behind a wall. And where the stain is genuinely ambiguous after all of this, the broader framework in telling damp from a leak is worth reading alongside it.
What a moisture meter cannot tell you
More wrong diagnoses come from misread moisture meters than from any other single cause, because the instrument does not measure what most people believe it measures.
| Instrument | What it actually measures | What it is commonly assumed to measure |
|---|---|---|
| Pin type meter | Electrical resistance between two pins, which varies with conductivity | Percentage moisture content of masonry. It does not do this at all on brick or plaster |
| Capacitance or search meter | A dielectric response in the surface layer, a few millimetres deep | Depth of moisture, or moisture behind plaster |
| Thermal camera | Apparent surface temperature | The presence and extent of water |
| Hygrometer | Relative humidity of the air at that point | Whether the wall is wet |
| Carbide or oven dry test | Actual moisture content of a sample by mass | Correctly understood, but rarely used because it means drilling the wall |
The pin meter problem is the important one. It responds to conductivity, and hygroscopic salts are highly conductive. A wall that has been damp at some point in the past holds nitrate and chloride salts deposited at the old evaporation zone, and those salts will produce a high reading on masonry that is now perfectly dry. They also absorb moisture from humid air, so the wall genuinely does get damp in muggy weather without any water source at all. A meter reading on its own therefore cannot distinguish an active leak from a historic one, which is separately worth understanding when you need to know whether a leak is new or old.
The honest position is that these instruments are comparative tools. They are good at showing where a wall is wetter than the wall next to it, which is genuinely useful for mapping. They are not diagnostic on their own, and a survey that consists of a meter, a number and a recommendation is not a survey. A proper damp and moisture investigation reads surface temperature, air conditions and moisture pattern together, and it eliminates the plumbing before it blames the building.
What to do next, and what not to do first
The order matters, because two of the common first moves actively destroy evidence.
- Do not redecorate yet. Painting over a stain removes the only record of its shape and extent, and stain blocking primer will hide a growing problem for months.
- Do not replaster yet. New plaster on a wet wall fails, and it removes the surface that carries the salts and the pattern.
- Do not commission a chemical damp proof course until somebody has been outside and confirmed that the existing DPC is not simply bridged by raised ground or render.
- Do record. Dated photographs, a pencil line at the edge, a note of the weather, and a note of which rooms and appliances were in use.
- Do check the cheap things. Gutters, downpipes, the pointing above the stain, and the ground level outside. A blocked gutter accounts for a surprising share of wall stains.
- Do isolate and observe if a pipe is suspected, taking a meter reading before and after a period with the stop tap closed.
On cost, the variables here are what has to be eliminated rather than what has to be repaired. A case that resolves to a visible external defect is quick. One that requires eliminating supply, heating and waste pipework, then reading conditions across a winter, is not. What is confirmed before anyone travels is what the visit covers and what it will cost, and a written finding that names the cause and the evidence for it is worth considerably more than a number on a meter.
How we help with this
If the article describes a problem you actually have, these are the visits that deal with it.
- damp and moisture surveys
Moisture mapping that separates a leak from condensation or damp.
- leak detection in London
Finding a hidden leak without opening the property up first.
- thermal imaging surveys
Infrared showing where warm or cold water tracks behind a surface.
Frequently asked questions
How do I tell if a stain on my wall is a leak or damp?
Start with height, edge and timing, which cost nothing. Rising damp is low level with a fairly even horizontal top edge, because capillary rise is self limiting. Penetrating damp appears after driving rain and sits on an external wall. Condensation is diffuse, seasonal and often shows as mould rather than a stain. A plumbing leak ignores the weather, can appear on an internal wall, and usually has a defined edge with a tail running downward from a darker centre.
Can rising damp reach halfway up a wall?
No. Rising damp is capillary movement of ground water through masonry, and it can only climb until evaporation from the surface balances the supply. In practice that means low level, commonly no more than about a metre and often less. A damp patch at head height on a ground floor wall is not rising damp, and one at first floor level certainly is not. Where a stain sits high and runs downward, look above it rather than below it.
Why does my damp meter show high readings on a dry wall?
Because a pin type meter measures electrical resistance rather than moisture content. Hygroscopic salts, principally nitrates and chlorides, are left behind in masonry where damp has evaporated in the past, and they are highly conductive. They produce high readings on a wall that is now dry, and they also absorb moisture from humid air, so the wall genuinely dampens in muggy weather with no water source. A meter reading alone cannot distinguish an active leak from a historic one.
Do I need a chemical damp proof course?
Far less often than it is recommended. Most London buildings already have a damp proof course, and the common problem is that it has been bridged rather than that it has failed. Raised paving or soil above the line, render carried down past it, mortar debris in the cavity, or an internal screed crossing it all defeat a perfectly sound barrier. Have somebody look at the external ground level first, because that check is free and it changes the answer frequently.
Is black mould on a wall a sign of a leak?
Usually it points the other way. Mould needs sustained high humidity at a surface, which is characteristic of condensation on a cold spot rather than of a pipe delivering clean water into a wall. Mould concentrating in corners, at window reveals, behind furniture against an external wall, and appearing each winter is describing surface temperature, ventilation and moisture production. A leak more often produces a defined stain, softened plaster and a musty smell without that classic spotty growth pattern.
Should I paint over a water stain on the wall?
Not until the cause is settled. The shape, extent and edge of the stain are the best record you have of what is happening, and covering it removes that record. Stain blocking primer will hide a growing problem for months while the wall behind continues to wet. Mark the edge in pencil with the date, photograph it, and repeat in two weeks. Whether it grew, stayed the same or shrank, and in what weather, eliminates more candidates than most instruments do.