Swimming Pool Leak Detection: How to Confirm a Leak, Find It and What Drives the Cost
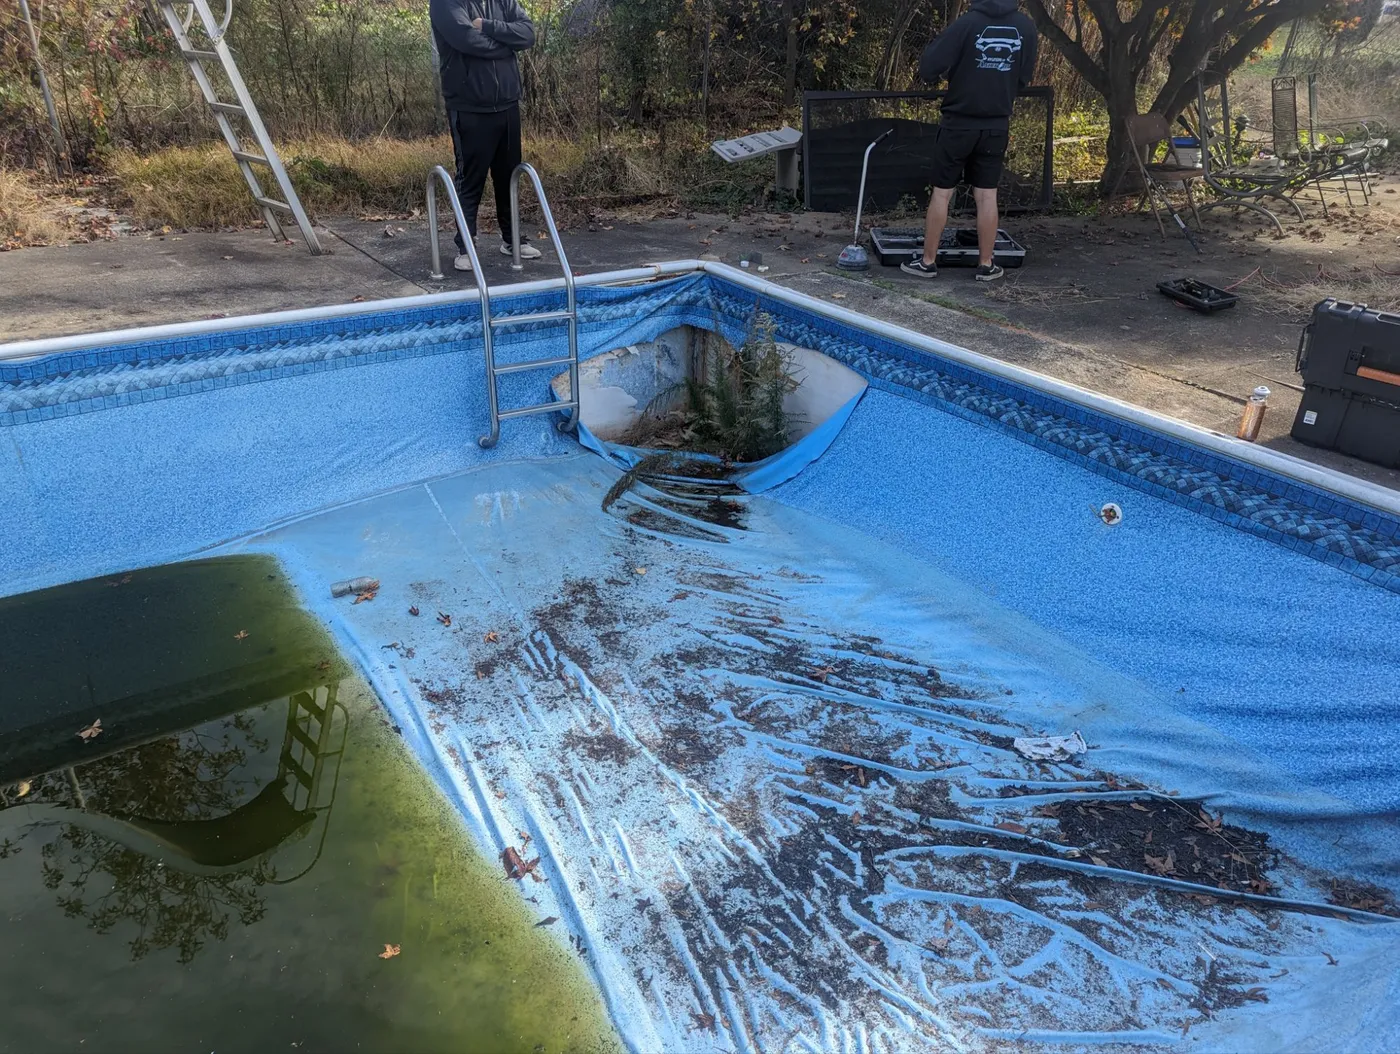
A pool that needs topping up is not automatically a pool with a leak. Here is how to prove it one way or the other, where the water is most likely going, and how a proper survey narrows it down before anyone lifts a slab.
Is the pool leaking, or is it evaporation?
Every pool loses water. The question is never whether the level falls but whether it falls faster than the weather, the bathers and the filter can account for. An uncovered outdoor pool in London loses water to evaporation all season, and the rate moves constantly with air temperature, water temperature, humidity, wind across the surface and how much the pool is used. Splash-out from a busy afternoon and a filter backwash both remove water without anything being wrong at all.
That variability is exactly why guessing is a waste of time. Owners tend to reach a conclusion on the basis that they are "always topping it up", which tells you very little, because a pool with a large surface area and no cover is always being topped up. Before a survey is worth booking, the loss has to be measured against something.
Running a bucket test that actually proves something
The bucket test works on one simple idea. Water sitting in a bucket on the pool steps experiences the same air temperature, humidity and wind as the pool surface, so it should evaporate at roughly the same rate. If the pool drops further than the bucket over the same period, the difference is going somewhere it should not.
- Fill a rigid bucket about three quarters full with pool water and stand it on a step so the bucket rim sits above the pool surface.
- Mark the water level inside the bucket and the pool level outside it, on the bucket wall, so both marks are on the same object and read against the same reference.
- Leave it undisturbed for 24 hours with nobody swimming, no backwashing and no automatic top-up running.
- Compare the two marks. Equal drops point to evaporation. A pool level noticeably lower than the bucket level points to a leak.
- Discard the result and start again if it rains, if the pool is used, or if the bucket is knocked.
An automatic water top-up device will hide the whole problem, so it has to be isolated for the duration of the test. So will a pool cover, which suppresses evaporation in the pool but not in the bucket and skews the comparison the other way.
Two things will invalidate the result outright rather than merely skew it. Rain adds water to both vessels but not equally, because the pool has a vastly larger catchment relative to its depth. Strong wind across the pool surface increases evaporation there far more than in a sheltered bucket sitting on a step. If either applies, the test has told you nothing and needs repeating in settled conditions. That is a real limitation of the method, and it is the reason a single inconclusive bucket test is not grounds for either booking a survey or ruling one out.
It is worth noting in passing that an automatic top-up connection is a plumbing fitting like any other. Under the Water Supply (Water Fittings) Regulations 1999 a connection that could allow pool water to return towards the drinking water supply requires appropriate backflow protection, and the same principle applies to a hose left submerged in the pool while filling. It is a small point that is routinely ignored and occasionally causes a water company to take an interest.
The pump-on, pump-off comparison
Running the test twice, once with the circulation pump on its normal cycle and once with it switched off entirely, is the most useful free diagnostic an owner can perform. The pressure side of the system, meaning the return pipework carrying filtered water back into the pool, only sees pressure while the pump runs. The suction side, meaning the skimmer and main drain lines, is under suction while the pump runs and static when it stops.
If the loss is clearly worse with the pump running, the pressure side moves to the top of the list. If it is worse with the pump off, or unchanged, the shell, the fittings or the suction lines become the priority. If the loss is identical in both conditions, attention shifts towards the structure rather than the plumbing. None of this locates anything on its own, but it tells an engineer which circuit to test first, and that shortens the survey considerably.
Where pool water actually escapes
Pool water leaves by four broad routes, and they behave differently enough that the symptoms usually point at one of them before any equipment comes out of the van.
The shell covers cracks in a concrete or rendered structure, splits and punctures in a liner, and failures in the waterproofing layer behind tiling. Movement cracks in a concrete pool often run in a recognisable direction and correspond to ground conditions around the structure rather than to anything that happened inside it.
The fittings and penetrations are every point where something passes through the shell: the skimmer throat and its faceplate, the main drain, the return inlets, the underwater light niche and the conduit behind it, and any inlet for an automatic cleaner. Penetrations are the single most common origin, because every one of them is a joint between two different materials that expand at different rates.
The buried pipework runs from the plant room to the pool, usually beneath a deck or hard landscaping. Buried leaks tend to show themselves in the garden rather than in the pool: a persistently soft patch, an area of grass that stays green through a dry spell, settlement in paving, or water finding its way into a nearby drain.
The plant room is the easiest of the four to check and the one owners most often overlook. A weeping pump seal, a dripping multiport valve, a filter clamp band that no longer seats, or a backwash valve passing water continuously to waste will empty a pool steadily while nothing at all is wrong with the pool itself.
| What you are seeing | Most likely origin |
|---|---|
| Level falls faster when the pump is running | Pressure side: return pipework or return fittings |
| Level falls only when the pump is off | Suction side, or a shell or fitting failure below the static line |
| Level stops falling level with the skimmer throat | Skimmer body, faceplate seal or the pipe connection behind it |
| Level stops falling just below an underwater light | Light niche, its seal, or the conduit running back from it |
| Level falls all the way towards the floor | Main drain, deep structural crack or a deep plumbing failure |
| Soft ground, settled paving or unusually green grass near the pool | Buried pipe run under the deck or surround |
| Water in the plant room floor or sump with the pool level stable | Pump seal, valve or filter clamp, not the pool |
| Chemical demand rises and heating costs climb with no obvious cause | Continuous dilution by a persistent low-rate leak |
Reading the static level before anyone tests anything
If the pool is allowed to find its own level over several days without being topped up, it will very often answer part of the question for free. Water leaks out until it reaches the height of the failure, and then it stops. Where it stops is therefore a clue about where the hole is.
A level that settles precisely at the mouth of the skimmer points at the skimmer assembly, which is a common failure because the skimmer body is typically a moulded unit grouted into the shell and the two materials do not move together. A level that settles just under a light points at the niche or the conduit behind it, which is often the route rather than the origin: water enters the niche and travels back along the conduit into the ground. A level that keeps falling towards the floor points somewhere deep, and a level that falls to a point with no fitting at that height points at the structure.
It is worth letting this happen rather than fighting it with the hose, provided the pool is not left so low that a liner is at risk of shrinking, slipping or floating, and provided the pump is switched off so it cannot run dry. Those two risks are real, which is why the test is worth discussing with an engineer before it is started on a liner pool or one with a high water table beneath it.
The detection methods and where each one earns its place
No single technique finds every pool leak, which is why a survey that leads with one instrument and nothing else tends to end in an excavation that could have been avoided. The methods complement each other, and the sequence matters more than the kit list.
Dye testing
A dense dye released close to a suspected point, with the pump off and the water completely still, will be drawn into a breach and disappear. It is precise, it costs almost nothing, and it is unmatched for confirming a suspect fitting, a visible crack or a liner seam. Its weakness is that it only works where a diver or an engineer can already get close to a candidate, and it is useless for anything buried.
Pressure testing the circuits
Each line is isolated at the plant room and at the pool, plugged, and brought up to a controlled test pressure. A circuit that holds is eliminated. A circuit that will not hold has been proven to be the leaking one, which converts a whole-site problem into a single pipe run. This is the step that makes everything afterwards efficient, because from here the search area is one pipe rather than an entire garden. Isolating and eliminating circuits one at a time is the same discipline that underpins our wider leak detection work across London.
Acoustic listening and correlation
Water escaping a pressurised pipe generates a characteristic noise that travels along the pipe wall and through the surrounding ground. Ground microphones pick it up at the surface, and where the pipe material and run allow it, a correlator compares the arrival time of that noise at two sensor positions to calculate a distance to the leak. It is the primary tool for pressurised buried runs and the natural follow-on from a failed pressure test. Our approach to acoustic leak detection is the same on a pool circuit as on a mains supply: pressurise, listen, correlate, then confirm.
Tracer gas
Where a line cannot hold pressure at all, where plastic pipework transmits sound poorly, or where site noise swamps the acoustics, the line is drained and charged with a hydrogen and nitrogen mixture. Hydrogen is the smallest molecule available for the job, so it migrates through backfill and finds its way to the surface, where a sensitive detector picks it up. It is the most precise option for buried and non-pressurised runs and it causes no damage while it is being used, which is why tracer gas detection is usually the method that decides exactly where a slab gets opened.
Thermal imaging
Thermal imaging reads surface temperature, not moisture, so it depends entirely on there being a temperature difference to see. On a heated pool that difference often exists, and warm water tracking under a deck or through a wall can show up clearly. On an unheated pool in mild weather it frequently shows nothing at all. It is a screening tool that narrows an area for another method to confirm, and treating it as a locator is the most common way to misread a survey.
| Method | Best applied to | Main limitation |
|---|---|---|
| Bucket test | Proving that a leak exists at all | Confirms loss, locates nothing |
| Static level observation | Narrowing to a depth band or a fitting | Needs days, and risk to a liner if run too low |
| Dye test | Confirming a suspected fitting, crack or seam | Only works on accessible candidates |
| Circuit pressure testing | Isolating which pipe run has failed | Proves the circuit, not the point |
| Acoustic and correlation | Pressurised buried runs under deck or landscaping | Needs pressure, and struggles in high ambient noise |
| Tracer gas | Non-pressurised or plastic buried runs, precise pinpointing | Line must be drained and charged first |
| Thermal imaging | Screening a broad area on a heated pool | No temperature difference means no image |
The order a competent pool survey follows
The logic runs from cheapest and least invasive to most specialised, and each step either eliminates something or narrows the area. Skipping the early steps does not save time, it just moves the guesswork later.
- Confirm the loss is real and quantify it, using the bucket comparison in both pump states.
- Rule out the plant room completely, including the backwash line, before touching the pool.
- Read the static level and note the height at which it stabilises.
- Inspect and dye test the accessible fittings and any visible defect in the shell or liner.
- Isolate and pressure test each circuit separately, recording which hold and which do not.
- Apply acoustic or tracer gas work only to the circuit that failed, then mark a point.
- Expose that point, confirm the finding visually, and repair.
A report that comes back from this process should tell you what was eliminated as well as what was found. The eliminations are what make the conclusion defensible, and they are also what stops a second engineer repeating the same tests a fortnight later.
What actually drives the cost
Pool leak detection is priced against the work required rather than against the pool, so the variables that move the figure are all to do with how hard the leak is to reach and how much testing it takes to isolate it. Construction type is the single biggest determinant, because it decides both where the failure is likely to be and what has to happen to reach it.
| Pool construction | Where failures concentrate | How it is usually confirmed |
|---|---|---|
| Liner over a block or steel wall structure | Seams, the area around fittings, and puncture damage from below or above | Dye test at the seam or fitting, with the pump off and the water still |
| Tiled concrete shell | Waterproofing behind the finish, movement cracks, grout at penetrations | Static level observation to a depth band, then dye testing of visible defects |
| Rendered or painted concrete | Structural cracking, often related to ground movement around the shell | Visual survey and dye test, with the crack pattern read for direction |
| One-piece moulded shell | Fittings and penetrations rather than the shell itself | Circuit pressure testing first, since the shell is rarely the origin |
| Any pool with buried plant room runs | The pipe runs under decking, terracing or driveway | Circuit isolation, then acoustic correlation or tracer gas on the failed line |
Construction type. A liner pool with an accessible seam is a different proposition from a tiled concrete shell where the waterproofing sits behind the finish, and a one-piece moulded pool is different again.
Where the leak turns out to be. A weeping fitting at the skimmer is found and repaired in a single attendance. A failed return line under a stone terrace involves circuit testing, correlation or tracer gas, and then a careful excavation with reinstatement afterwards.
What is on top of the pipework. Pipework under a lawn and pipework under a bonded resin driveway carry very different reinstatement costs even when the repair itself is identical, which is why narrowing the search area before breaking ground is where the real saving lives.
Plant room access and system documentation. A plant room with labelled, valved circuits can be isolated and tested quickly. An unlabelled manifold buried behind equipment adds time before any testing begins.
How long it has been leaking. Water washing fines out of the ground beneath a structure creates a second, more expensive problem than the pipe itself, and that is the reason early investigation is cheaper than patient observation. Our current detection and repair pricing is published rather than quoted case by case, and a pool leak detection survey is scoped against these variables before any work starts.
Repair options, and reducing the chance of a repeat
Once the point is known, the repair follows the construction. Liner punctures and seam failures are patched, wet or dry depending on location. Failed fittings are usually resealed or replaced, with the skimmer throat and light niche being the two that most often need the surrounding material cut back and rebuilt rather than simply sealed over. Structural cracks need the cause understood before the crack is filled, because a movement crack that is patched without addressing the movement reopens. A failed buried line is cut out and rejointed, or where the run is short and the ground is opened anyway, replaced entirely.
Prevention, for a pool, is mostly about not letting small failures run. Check the plant room floor regularly rather than only when something looks wrong. Watch the backwash line for water passing to waste when the valve is in the filter position, which is a slow and completely silent loss. Keep an eye on chemical consumption, because a pool being constantly diluted by fresh water needs more dosing and that trend often appears before the level does. And where ground conditions around the pool are known to move, a periodic inspection of the shell and the surround is worth more than an annual top-up bill.
If the pool is losing water fast enough to be dropping visibly day to day, or if water is surfacing in the garden or in a neighbouring structure, it stops being a pool problem and becomes a water escape problem. That is the point to treat it as an emergency leak investigation rather than a seasonal maintenance job.
How we help with this
If the article describes a problem you actually have, these are the visits that deal with it.
- our full guide to leak detection
How each method works and when it is the wrong tool for the job.
- leak detection in London
Finding a hidden leak without opening the property up first.
- swimming pool leak detection
Structure, liner and circulation tested separately.
Frequently asked questions
How much water loss is normal for a swimming pool?
There is no single figure, because evaporation depends on air temperature, water temperature, humidity, wind across the surface and whether the pool is covered. That is precisely why the bucket test exists: it measures your pool's evaporation under your conditions on that day, rather than comparing it to an average. If the pool and the bucket drop by the same amount over 24 undisturbed hours, the loss is evaporation. If the pool drops noticeably further, the difference is a leak and is worth investigating.
Does the pool leak get worse when the pump is running?
That depends on which part of the system has failed, and the answer is genuinely useful. The return pipework is only pressurised while the pump runs, so a failure there loses more water during the filtration cycle. The skimmer and main drain lines are under suction while the pump runs and static when it stops, so a failure there often shows differently. Running the bucket test twice, once with the pump on and once with it off, tells an engineer which circuit to isolate and test first.
Can a pool leak be found without digging up the deck?
In most cases, yes. The point of a structured survey is to eliminate the plant room and the accessible fittings first, then isolate and pressure test each circuit so that only one pipe run remains in question, then apply acoustic correlation or tracer gas to that run alone. What gets opened afterwards is a marked point rather than a search trench. Digging is sometimes still required to reach the repair, but it should be a targeted excavation informed by a located finding, not exploratory work.
Why is my pool losing water but the ground around it looks dry?
Buried water does not always surface. It frequently follows the line of the pipe trench, which is backfilled with looser material than the surrounding ground, and runs until it meets something more permeable or reaches a drain. In London it is common for pool water to end up in a nearby surface water drain and never appear at the surface at all. A dry garden therefore rules nothing out, and tracer gas is often the method that resolves these cases because it detects the gas path rather than waiting for visible water.
What should I check before calling anyone about a pool leak?
Four things, all free. Isolate any automatic top-up device so it cannot mask the loss. Run a bucket test for 24 undisturbed hours, ideally twice, with the pump on and then off. Walk the plant room and look for water on the floor, a weeping pump seal, or water passing continuously down the backwash line while the valve is set to filter. Finally, note the height at which the pool level stops falling if you let it settle. Those four answers shorten a survey significantly.
Is a leaking pool an emergency?
Usually not, but sometimes yes. A pool losing a small amount more than evaporation accounts for is a maintenance problem that should be investigated before the season, not overnight. It becomes urgent when the level is dropping visibly from one day to the next, when water is surfacing in the garden, when paving or a deck is settling, or when water is appearing in a basement, a garage or a neighbouring property. Ground being washed out from beneath a structure is a far more expensive problem than the pipe that caused it.