How to Find a Central Heating Leak: The Checks That Work and the Ones That Waste Time
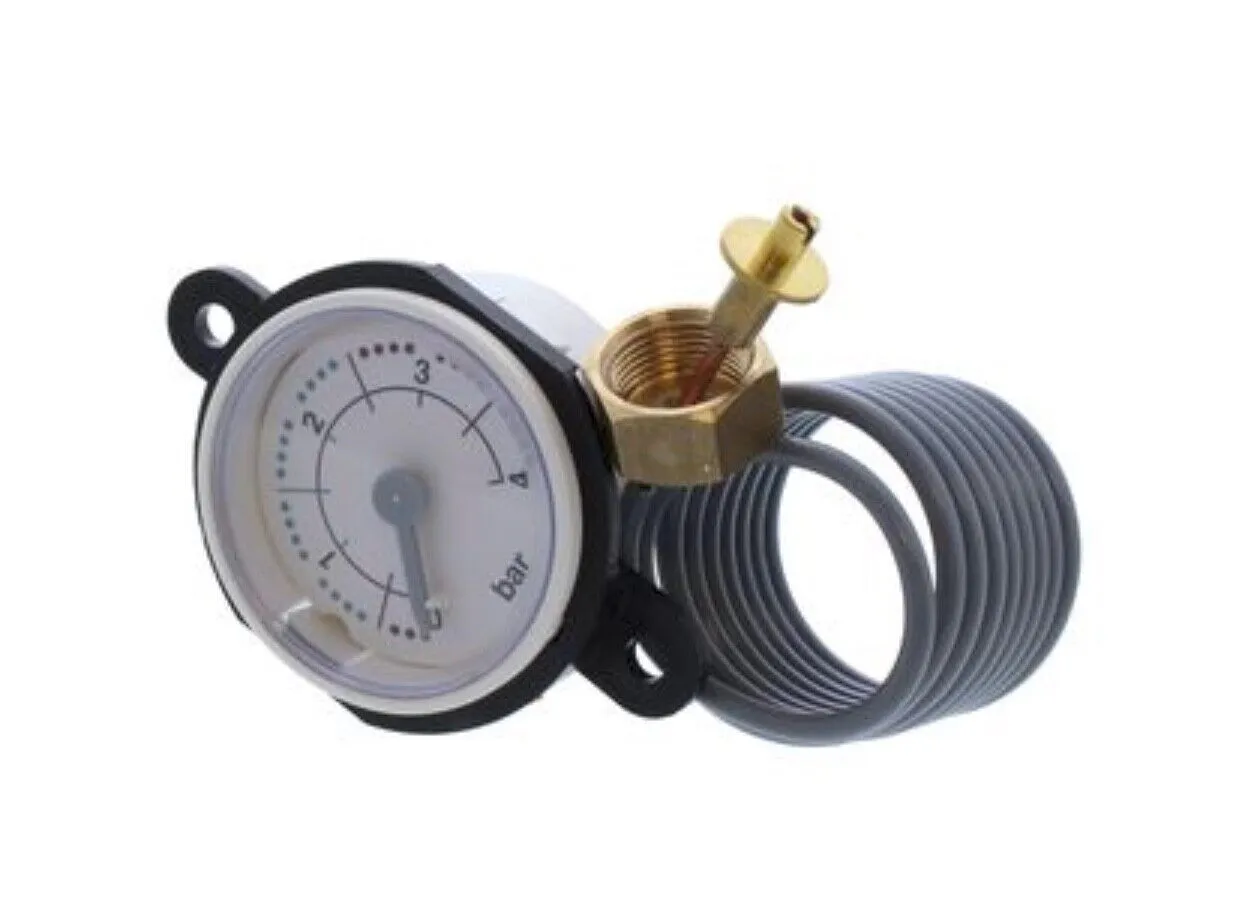
Most people start looking for a central heating leak because the boiler pressure keeps falling. That is a symptom with at least four common causes, and only one of them is a leak. Here is the order in which to eliminate them.
The short version
- A falling boiler pressure gauge has at least four common causes and only one of them is a leaking pipe.
- Most sealed systems sit around 1 to 1.5 bar when cold, but the correct figure is whatever the boiler manufacturer specifies for that appliance.
- Check the pressure relief discharge pipe outside before anything else. A wet one means the system is losing water to the street, not into your floor.
- Record cold, hot and cold-again pressures over one full heating cycle. Behaviour across a cycle diagnoses far more than a single reading.
- A cold patch at the bottom of a radiator is sludge, not a leak. A cold top is air. Neither loses water.
- Where the pipework is genuinely losing water, thermal imaging and tracer gas locate it without lifting a whole floor.
A falling pressure gauge is a symptom, not a diagnosis
The overwhelming majority of central heating leak enquiries begin the same way: the boiler pressure gauge keeps dropping and the system needs repressurising every few days or every few weeks. It is a reasonable thing to worry about, but it is not evidence of a leak on its own. A sealed heating system can lose pressure through at least four distinct mechanisms, and three of them involve no leaking pipe anywhere in the building.
Getting this order right matters financially. Lifting floors to chase a leak that turns out to be a failed expansion vessel is the single most expensive mistake made in this area, and it is entirely avoidable with about half an hour of testing. A competent survey eliminates the boiler and its ancillaries before it starts looking at the pipework.
The expansion vessel
Water expands when it is heated. A sealed system absorbs that expansion in a vessel divided by a flexible diaphragm, with air or nitrogen pressurised behind it. When the diaphragm fails, or the air charge behind it leaks away over the years, there is nowhere for the expansion to go. The pressure then climbs sharply as the system heats up, lifts the pressure relief valve, and falls back to somewhere below where it started once the system cools. The gauge reading looks exactly like a slow leak.
The tell is behaviour rather than absolute numbers. A healthy sealed system shows a modest pressure rise from cold to hot and returns to roughly the same cold figure afterwards. A system with a failed or flat vessel shows a large swing and a cold reading that is lower after every heating cycle. Most domestic sealed systems are set to somewhere around 1 to 1.5 bar cold, but that is a convention rather than a rule, and the figure that matters is the one in the manufacturer's instructions for that specific appliance. The vessel precharge is likewise checked with the system drained of pressure and compared against the manufacturer's stated figure rather than against a rule of thumb.
The pressure relief valve
The pressure relief valve is a safety device set to open at a defined pressure, commonly 3 bar on domestic sealed systems, and it discharges through a pipe that terminates outside. Once debris has been through the seat, or once it has lifted repeatedly because of an expansion vessel problem, it frequently fails to reseat properly and passes water continuously at normal operating pressure.
The check is simple and costs nothing. Find the discharge pipe outside, usually a small copper or plastic pipe emerging low on an external wall near the boiler, and look for evidence that water has been running from it: staining, a wet patch below it, limescale streaking, or moss growth that stops abruptly. A dry, clean discharge pipe is a meaningful elimination. A wet one means the system is losing water to the outside world and nothing inside the building is leaking at all.
Automatic air vents and the filling loop
An automatic air vent that sticks open will pass water rather than air and will usually leave evidence in the airing cupboard or above the boiler. A filling loop left connected and slightly open does the opposite: it quietly tops the system up, masking a genuine leak entirely and making a real problem invisible for months. Under the Water Supply (Water Fittings) Regulations 1999 a temporary filling connection is required to be disconnected after use, and a permanent one must have appropriate backflow protection, because inhibited heating water must not be able to find its way back into the drinking water supply.
The elimination tests, in the order they should be run
These are the checks that turn a vague complaint into a defined problem. Each one either rules something out or moves it to the top of the list.
- Record the cold pressure, run the heating to full temperature, record the hot pressure, then record the cold pressure again once the system has fully cooled. Three readings, one cycle.
- Check the pressure relief discharge pipe outside for any sign of water having passed through it.
- Confirm the filling loop is disconnected, or if permanently plumbed, that both valves are closed and the loop is not passing.
- Read the water meter with every outlet in the property closed and the heating running. Movement points at the mains rather than the heating circuit.
- Isolate the heating circuit at the flow and return where valves allow it, and watch the pressure on the isolated section separately from the rest.
- Walk every radiator, checking the valve spindles, the union nuts at both ends and the bleed points, then run a finger underneath each valve body.
If the pressure holds steady on an isolated circuit, the loss is in the boiler or its ancillaries. If the isolated circuit loses pressure on its own, there is a leak in the pipework and the search moves into the building fabric. That single test is what separates a boiler job from a leak detection job, and it should happen before anything is lifted.
Where central heating leaks actually happen
Heating systems fail in predictable places, and the pattern differs sharply between a house with its original pipework and a flat refurbished in the last fifteen years.
Radiator valves, unions and spindles
The most common visible leak on any heating system is at a radiator connection. Thermostatic valve spindles weep as the gland packing ages, particularly on valves that are rarely moved and then turned in autumn after a summer sitting fully open. Union nuts loosen with thermal cycling. The evidence is often a rust bloom on the valve body or a dark patch on the floor covering rather than an obvious drip, because a slow weep evaporates against a hot valve almost as fast as it appears.
Joints beneath floors and in screed
Buried joints are where the expensive problems live. Compression fittings and push-fit joints under floorboards, in joist voids, or cast into screed will eventually move, and when they do there is no visible sign until water reaches a ceiling below or a floor covering starts to lift. Good practice is not to bury a mechanical joint at all, so a leak at a buried joint often indicates a past alteration rather than the original installation.
The boiler and its internals
A leak inside the casing is a boiler repair rather than a leak detection job, but it presents identically from the gauge. Heat exchangers, pump head gaskets, diverter valve cartridges and the connections on the hydraulic block all fail, and the resulting water often evaporates on hot surfaces before it can drip, which is why a boiler can be losing water steadily with a dry floor beneath it.
Microbore and older pipework
Systems plumbed in microbore are more sensitive to debris, and a partially blocked run behaves differently under pressure than a clean one. Older copper in London properties frequently sits alongside modern plastic after decades of alterations, and the transitions between materials are where movement and corrosion concentrate.
| Pipe or component | Typical failure mode | Where it usually shows |
|---|---|---|
| Copper, soldered joints | Fatigue at bends and joints from repeated thermal movement | Ceiling stain below, or damp in a joist void |
| Copper, compression joints buried | Nut relaxation and olive movement over years of cycling | Slow, hidden, often first seen as a pressure loss only |
| Copper, small bore under a solid floor | Pinholing from internal corrosion and poor water quality | A persistently warm patch on the floor surface |
| Plastic barrier pipe, push-fit | Insert omitted or pipe not fully home at installation | Fails early in life, often within the first heating seasons |
| Plastic pipe in screed | Mechanical damage during a later floor fixing or alteration | Sudden onset with no prior symptoms |
| Thermostatic radiator valve | Gland packing wear, weeping at the spindle | Rust bloom on the valve, damp patch on the floor |
| Radiator body | Internal corrosion pinholing, usually from the bottom of the panel | Visible drip and staining, often after years of sludge |
| Expansion vessel | Diaphragm failure or loss of air charge | No leak at all, just a falling gauge |
The false alarms that send people looking for leaks that are not there
A significant proportion of heating leak call-outs end with no leak. That is not a failure of the call-out, it is the point of it, but a good deal of worry and expense can be avoided by recognising the common impostors first. Each of these produces a symptom that reads like a leak and is caused by something else entirely.
| What you are seeing | What it usually is | How to tell |
|---|---|---|
| Radiator cold at the bottom, warm at the top | Magnetite sludge settled in the bottom of the panel | No water is being lost and the pressure is stable |
| Radiator cold at the top, warm at the bottom | Air trapped at the high point of the radiator | Bleeding releases air, then pressure needs topping up once |
| Pressure falls after bleeding radiators | Normal, because the released air was part of the system volume | One top-up restores it and it then holds |
| Pressure swings high when hot and low when cold | Expansion vessel diaphragm failure or lost air charge | Large swing across the cycle, cold reading lower each time |
| Damp wall near an external corner in winter | Condensation in a cold, poorly ventilated spot | Surface moisture with dry readings at depth, and relative humidity is high |
| Damp patch below a boiler | Condensate discharge pipe blocked, split or frozen | The water is acidic condensate from the flue, not system water |
| Warm floor patch that does not spread | The heating pipe route itself, running under that spot | It follows a straight line and the pressure holds |
| System needs topping up only after an engineer visit | Water lost during the work, not a leak | It holds steadily afterwards with no further loss |
The consistent thread is that a genuine leak loses water continuously and therefore shows as a pressure loss that keeps returning after every top-up. Anything that happens once and then stops is not a leak.
Locating the leak without lifting the floor
Once the pipework has been proven to be losing water, the objective changes from finding out whether there is a leak to finding out exactly where it is, and doing so with the smallest possible opening.
Thermal imaging is usually the first instrument out, because a heating system offers something no other leak type does: a large, controllable temperature difference. Running the system hot and imaging floors and walls will frequently show the pipe runs themselves as warm lines and a leak as a broader, diffuse warm area that does not follow a pipe route. That is a genuine advantage of heating leaks over cold water leaks, and it is why thermal imaging is far more productive on a heating circuit than on a mains leak in an unheated void.
Acoustic work has a place where the circuit can be pressurised and the noise of escaping water can be picked up through the structure, though a heating circuit at normal operating pressure is quieter than a mains supply and the results are correspondingly harder to read. Where the readings are ambiguous, acoustic detection is used to narrow rather than to conclude.
Tracer gas is the method that resolves the difficult cases. The circuit is drained and charged with a hydrogen and nitrogen mixture, which escapes at the failure point and rises through screed, floorboards or backfill to a surface detector. It works where there is no useful temperature difference, where the pipework is plastic and transmits sound badly, and where the leak rate is too low to be heard. For pipework cast into a solid floor, tracer gas is usually what decides where the one hole gets cut.
Moisture measurement runs alongside all of this. Surface and depth readings across a floor establish the extent of the wetting, which is not the same as the location of the leak, because water travels. A survey that reports the wettest point as the leak point without corroboration is reporting where the water arrived, not where it left the pipe. Our full approach to central heating leak detection sequences these methods rather than leading with one.
Every one of these instruments has conditions under which it produces nothing useful, and a survey that does not acknowledge that is selling rather than diagnosing.
| Method | What it establishes | What it cannot do |
|---|---|---|
| Pressure observation across a heat cycle | Whether water is being lost, and roughly how fast | Cannot distinguish a pipe leak from a vessel or valve fault on its own |
| Circuit isolation | Which part of the system is losing pressure | Needs valves in the right places, which older systems often lack |
| Thermal imaging | Pipe routes and diffuse warm areas that break the pattern | Needs a temperature difference, and thick carpet or underlay flattens the image |
| Acoustic listening | Escaping water noise through structure on a pressurised circuit | Needs pressure, and is defeated by plastic pipe and by ambient noise |
| Tracer gas | A precise surface point above the failure, through screed or boards | Requires the circuit to be drained first, so the heating is off during the work |
| Moisture meters | The extent and depth of wetting across an area | Shows where water arrived, which is frequently not where it left the pipe |
| Endoscope through a small opening | Visual confirmation of a suspected point in a void | Only useful once the area has already been narrowed by something else |
Water quality, sludge and why the same system leaks twice
A heating system that has leaked once and been repaired will often leak again somewhere else within a few years, and the reason is usually the water inside it rather than the pipe that failed. Untreated system water corrodes steel radiators from the inside, generating magnetite sludge that circulates, settles in low points and accelerates wear at pumps, valves and the thinnest sections of pipe.
BS 7593:2019, the British Standard code of practice for the preparation, commissioning and maintenance of domestic central heating systems, sets out what good practice looks like. It expects the system to be cleaned and dosed with a corrosion inhibitor at commissioning, a permanently installed in-line filter capable of capturing magnetic and non-magnetic debris, an annual check of the inhibitor concentration, and either a full water test or a re-dose at five-yearly intervals. Every time a system is drained down for a repair, the inhibitor goes with the water and has to be replaced.
Two practical consequences follow. First, if a leak repair involves a drain down, the inhibitor is part of the job rather than an optional extra. Second, if a system has repeatedly pinholed, the water condition is worth testing before the next repair, because otherwise the repair is treating a symptom. A property that has had several leaks in a decade has a water quality problem, not a run of bad luck.
What to do while you are waiting
If the system is losing pressure slowly and there is no visible water, the situation is stable enough to investigate methodically. If water is visibly escaping, the priorities change.
- Turn the heating off at the programmer and let the system cool. Cooling drops the pressure and slows the escape.
- Close the valves at both ends of a leaking radiator to isolate it from the rest of the circuit. On a thermostatic valve, turn the head fully closed; on the lockshield end, use the cap and a spanner.
- Contain rather than chase. A tray, towels and moving furniture and floor coverings clear of the area will prevent more damage than trying to tighten a fitting that is already wet and hot.
- Do not keep repressurising a system that will not hold. Repeated topping up pushes more fresh, oxygenated and uninhibited water through the system and accelerates the corrosion that caused the problem.
- Photograph everything before anything is moved or dried, including the gauge reading, and note the dates. If an insurance claim follows, that record is the most useful thing you will have.
Water escaping onto a ceiling below, near a consumer unit, or into a downstairs flat is a different category of problem and should be treated as an immediate escape of water rather than a heating fault. In that situation the water gets isolated first and the diagnosis happens afterwards, which is the sequence our emergency leak detection attendance is built around.
How we help with this
If the article describes a problem you actually have, these are the visits that deal with it.
- our full guide to leak detection
How each method works and when it is the wrong tool for the job.
- central heating leak detection
For a boiler losing pressure or a circuit that will not hold.
- leak detection in London
Finding a hidden leak without opening the property up first.
Frequently asked questions
Does a boiler losing pressure always mean there is a leak?
No, and assuming it does is the most expensive mistake in this area. A sealed system loses pressure for at least four reasons: a genuine leak in the pipework, a failed or discharged expansion vessel, a pressure relief valve that is passing water to the outside discharge pipe, or an automatic air vent stuck open. The last three involve no leaking pipe in the building at all. Check the discharge pipe outside for staining and record cold, hot and cold-again pressures before anyone lifts a floor.
How do you find a central heating leak under a solid floor?
The heating system's own heat is the advantage. Running the circuit hot and imaging the floor with a thermal camera usually reveals the pipe runs as warm lines and a leak as a broader warm area that does not follow a pipe route. Where there is no usable temperature difference, or where the pipework is plastic and does not carry sound well, the circuit is drained and charged with a hydrogen and nitrogen tracer gas that escapes at the failure and is detected at the floor surface, allowing a single targeted opening.
Can I keep topping the boiler up until it can be looked at?
For a short period, if the loss is slow and nothing is visibly escaping. It is not a good long-term position. Every top-up introduces fresh, oxygenated water that has no corrosion inhibitor in it, which accelerates the internal corrosion that produces sludge and pinholing. Repeated repressurising therefore makes the underlying condition worse while hiding the symptom. If the system needs topping up more often than every few weeks, it needs diagnosing rather than managing.
Why does the same heating system keep developing leaks?
Usually because of the water inside it. Untreated system water corrodes steel radiators from the inside and generates magnetite sludge that circulates and accelerates wear at pumps, valves and thin-walled pipe sections. BS 7593:2019 expects a cleaned system dosed with corrosion inhibitor, a permanent in-line filter capturing magnetic and non-magnetic debris, an annual inhibitor check and a re-dose or full water test every five years. A property that has pinholed several times in a decade has a water quality problem rather than bad luck.
How can I tell a heating leak from a mains water leak?
Isolate and observe them separately. Close every outlet in the property and read the water meter with nothing running: movement points at the mains supply rather than the heating. Then watch the boiler pressure gauge over a full heat and cool cycle with the heating isolated where the valves allow it. A heating leak drops the gauge and does not move the meter. A mains leak moves the meter and leaves the gauge alone. A system with a passing filling loop can do both at once, which is why the loop is checked first.
Is a central heating leak covered by home insurance?
Most buildings policies respond to a sudden escape of water and to the damage it causes, and many include a trace and access extension that covers the cost of locating the leak and of the opening up and making good required to reach it. Cover generally does not extend to the failed component itself, and gradual deterioration is commonly excluded. Notify the insurer before commissioning work rather than afterwards, and ask for detection, repair and reinstatement to be identified as separate costs on the paperwork.